In order to connect to the Projetex Workstation through a Local Area Network (LAN) connection, the following conditions must be met:
Both the Projetex Server and Projetex Workstations must be installed on computers within the same LAN.
The firewall on the Projetex server computer must allow incoming connections from Projetex Workstations. TCP ports 211 and 47110 must be added to the list of firewall exclusions on the Projetex Server computer.
To connect to the Projetex Server through LAN, please do the following:
1. Before installing Projetex Workstations, install the Projetex Server on a computer in your Local Area Network. The Projetex Server can be installed on any computer in the network, no additional configuration is needed.
2. Run the Projetex Server Administrator, click the Database Server tab and make sure that the database server is ON. Switch to the Database tab and make sure that the Projetex database status is Online for Workstations. Close the Projetex Server Administrator (there is no need to keep it open, the server will be running even after you close the Projetex Server Administrator window).
3. Install and run Projetex Workstation on a computer in the same Local Area Network.
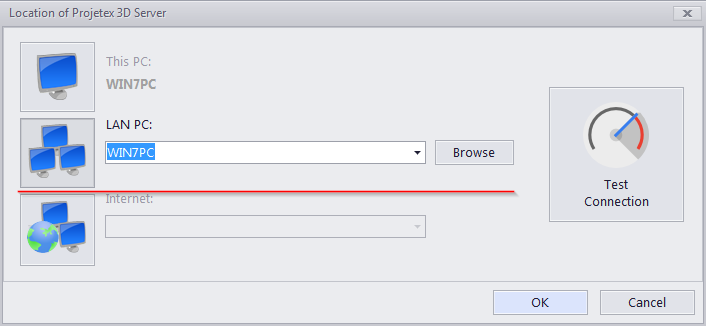
4. In the Login window click the Server button. In the Network Location of Projetex Server window click the LAN PC button.
5. Enter the network name of the computer, on which the Projetex Server had been installed, then click the Test Connection button.
6. If the connection is successful, click the OK button, and attempt to log into Projetex (the default login is Admin and the default password is admin).

See also:
User Login to Projetex Workstation