Custom fields can be created on the Corporate Settings tab of the Projetex Server Administrator. To create or modify custom fields:
1. Run the Projetex Server Administrator and switch the database into Offline mode on the Database tab.
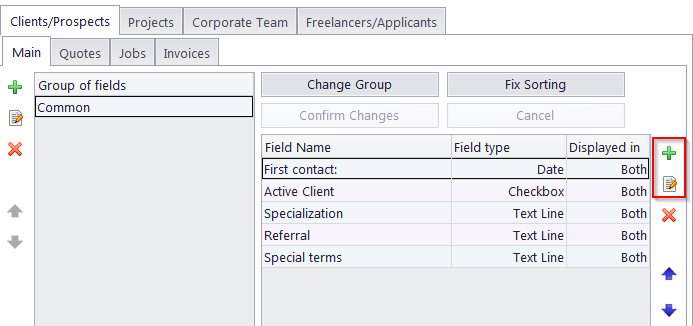
2. Switch to Corporate Settings tab and click Fields.
3. Select the required area tab (e.g. Clients >> Main)
4. Select a group of fields and click the New Field button.
5. Fill the fields of the New Custom Field window:
Enter the name of the new custom field in Name field.
Select the data type of the new custom field from Type drop-down list and any additional options (depending on the type selected.
Certain areas (such as the Main and Quotes tabs for Clients/prospects) have an additional drop-down menu, to choose which of the two tables a field should be displayed in.
(Optional) Enter the variable name for this custom field; you will be able to use this variable in .RTF templates.
Click OK to add the specified custom field or click Cancel to discard.
|
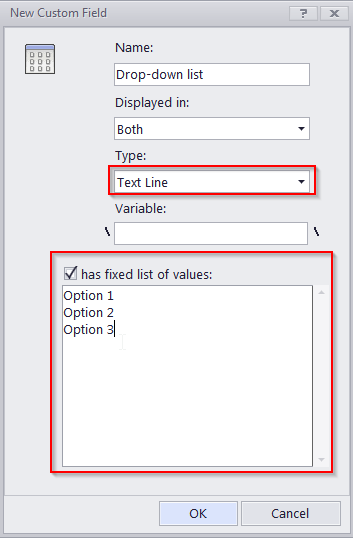
Example: To create a custom field that will look like a drop-down list, select Text line as the data type, and then check the Has fixed list of values check box. Enter the options for that check box in the field that appears:
|
To move the custom fields to another Group of fields, i.e. another tab, click the Change Group button, select the target group, and click OK.
If the list displays incorrect results after moving fields or groups around, click Fix Sorting.
To change the order of custom fields, use the Move Up Field/Move Down Field buttons.
To confirm changes to custom field settings, click the Confirm Changes button.
 Note: If you leave the Custom Fields settings without clicking this button, Projetex will ask you whether the changes should be saved.

See also:
Database Customization: Custom fields