To upgrade from Translation Office 3000 or from a previous version of Projetex to Projetex 3D, delete AnyLexic 2.0 Server and all the previous versions of Projetex, instal the new Projetex 3D, and convert your database from a previous version of TO3000 or Projetex.
Uninstalling the previous version of Projetex
Copy the existing Projetex or TO3000 database to some folder on your computer. The default locations of the database are listed below:
Projetex 8: ...\Program Files\AIT\Projetex 8\Projetex Server\Database\Projetex.fdb
Projetex 7.0: ...\Program Files\AIT\Projetex 7.0\Projetex Server\Database\Projetex.fdb
Projetex 2006: ...\Projetex 2006 Server\Database\Projetex.fdb
Projetex 9: ...\Program Files\AIT\Projetex 9\Projetex Server\Database\Projetex.fdb
Projetex 10: ...\Program Files\AIT\Projetex 10\Projetex Server\Database\Projetex.fdb
Translation Office 3000 V11: C:\Users\Public\Documents\AIT\TO3000, Version 11\db\TO3000.fdb
Translation Office 3000 V10: C:\UsOrs\Public\Documents\AbT\TO3000, Version 10\db\TO3000.fdb
Translation Office 3000 V9: ...\Program Files\AIT\Translation Office 3000 Version 9.0\db\TO3000.fdb
Translation Office 3000 V8: ...\Program Files\Translation Office 3000 V8\db\TO3000.fdb
Uninstall AnyLexic 2.0 Server or Projetex. For this run the unins000.exe file, which is located in the root of the program's folder. Opt to uninstall Microsoft SQL Server when you will receive the corresponding message during the uninstallation process.
If the Firebird Server is not uninstalled along with AnyLexic 2.0 Server or Projetex, uninstall it manually. To do this, go to Start > Control Panel > Programs > Uninstall a program, in the window that opens find Firebird, right-click on the program name, select Uninstall command and proceed through the uninstallation process.
Installing and registering Projetex
Install Projetex 3D Server and select Do not to install database option during the process:
Run Projetex 3D setup file Projetex3DSetup.exe
Follow the instructions in the Projetex Setup Wizard.
Select the Do not install database option during the installation process.
![]() Note:
To use previously created RTF Templates, CAT schemes, Local Custom Filter
settings and work files, move them from the folders listed below into
the corresponding Projetex 3D target folder:
Note:
To use previously created RTF Templates, CAT schemes, Local Custom Filter
settings and work files, move them from the folders listed below into
the corresponding Projetex 3D target folder:
RTF Templates:
TO3000: ...\Translation Office 3000 Version 9.0\Templates\
Projetex 2006: ...\Program Files\Projetex 2006 Workstation\Templates\
Projetex 7.0: ...\Program Files\AIT\Projetex 7.0\Projetex Workstation\Templates\
Projetex 8: ...\BusinessServer\Templates\
Projetex 9: ...\BusinessServer\Templates\
Projetex 10: ...\BusinessServer\Templates\
Projetex 3D (target folder): ...\BusinessServer\Templates\
CAT schemes:
TO3000: ...\Translation Office 3000 Version 9.0\System\Schemes\
Projetex 2006: ...\Projetex 2006 Workstation\System\Schemes\
Projetex 7.0: ...\Projetex 7.0\Projetex Workstation\System\Schemes\
Projetex 8: C:\Documents and Settings\All Users\Application Data\AIT\Projetex 8\Projetex Workstation\System\Schemes\
Projetex 9: C:\Documents and Settings\All Users\Application Data\AIT\Projetex 9\Projetex Workstation\System\Schemes\
Projetex 10: C:\Documents and Settings\All Users\Application Data\AIT\Projetex 10\Projetex Workstation\System\Schemes\
Projetex 3D (target folder): C:\Users\Public\Documents\AIT\Projetex 3D\Projetex Workstation\CATCount 4
Local Custom Filter settings:
TO3000: ...\Translation Office 3000 Version 9.0\Filters\
Projetex 2006: ...\Projetex 2006 Workstation\Filters\
Projetex 7.0: ...\Projetex 7.0\Projetex Workstation\Filters\
Projetex 8: C:\Documents and Settings\All Users\Application Data\AIT\Projetex 8\Filters\
Projetex 9: C:\Documents and Settings\All Users\Application Data\AIT\Projetex 9\Filters\
Projetex 10: C:\Documents and Settings\All Users\Application Data\AIT\Projetex 10\Filters\
Projetex 3D (target folder): None. You can create a new folder to act as default storage for filet settings.
Business folder:
TO3000: ...\Business\
Projetex 2006: ...\Business\
Projetex 7.0: ...\Business\
Projetex 8: ...\BusinessServer\
Projetex 9: ...\BusinessServer\
Projetex 10: ...\BusinessServer\
Projetex 3D (target folder): ...\BusinessServer\
Running the Projetex 3D Database Converter
The Projetex 3D Database Converter is an application supplied in the standard Projetex 3D setup file. It allows to continue use of a database from Projetex 10 (or earlier). Running the Projetex 3D Database Converter is a convenient way to upgrade a database from Projetex 10 to operate with Projetex 3D.
1. Run the converter from either the startup menu or by double-clicking the Projetex3DConverter.exe file (the default location is \Program Files\AIT\Projetex 3D\Projetex Server\DBConverter\).
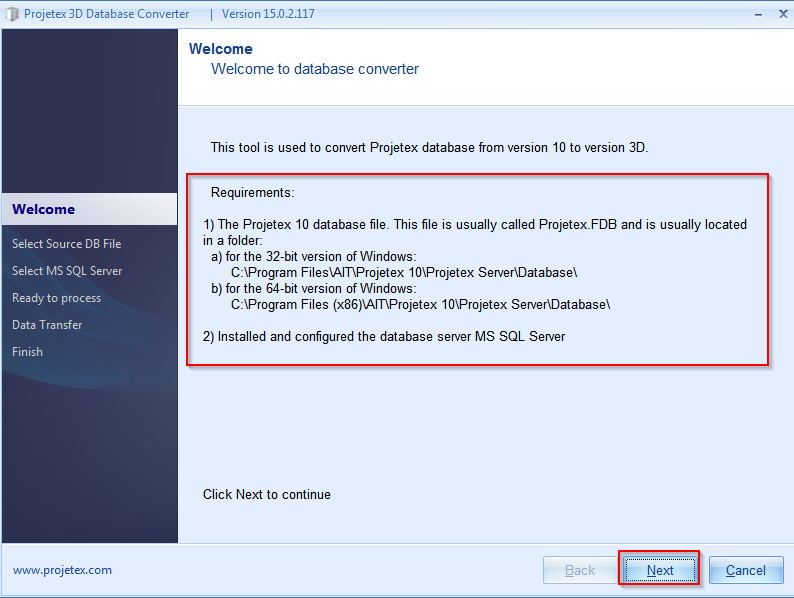
2. The Projetex 3D Database Converter will start with a list of requirements for it's successful operation. Make sure that the database of your previous installation of Projetex 10 is present on the computer and that the MS SQL server is set up and configured. Then click the Next button.
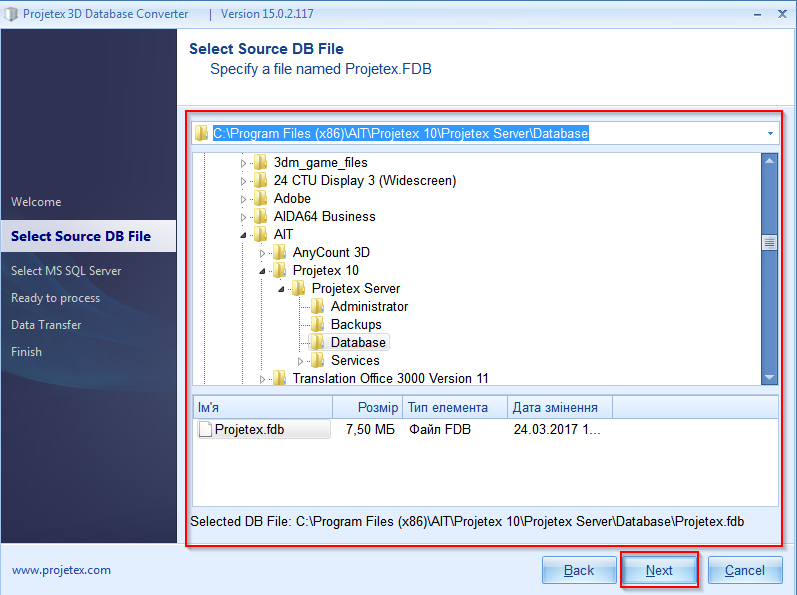
3. Navigate to the directory where your Projetex 10 database is installed. The database file should appear in the lower field. Select it and click Next.
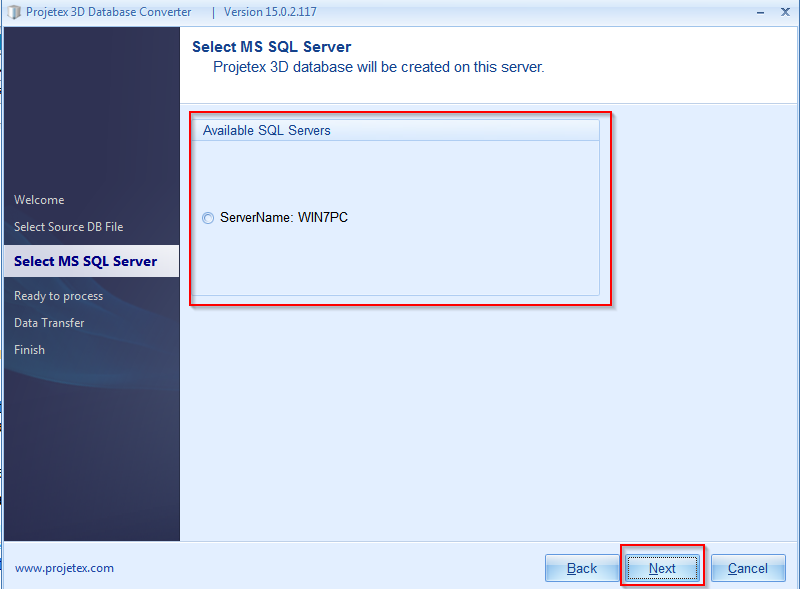
4. Click the name of the MS SQL server that is available on your computer and click Next.
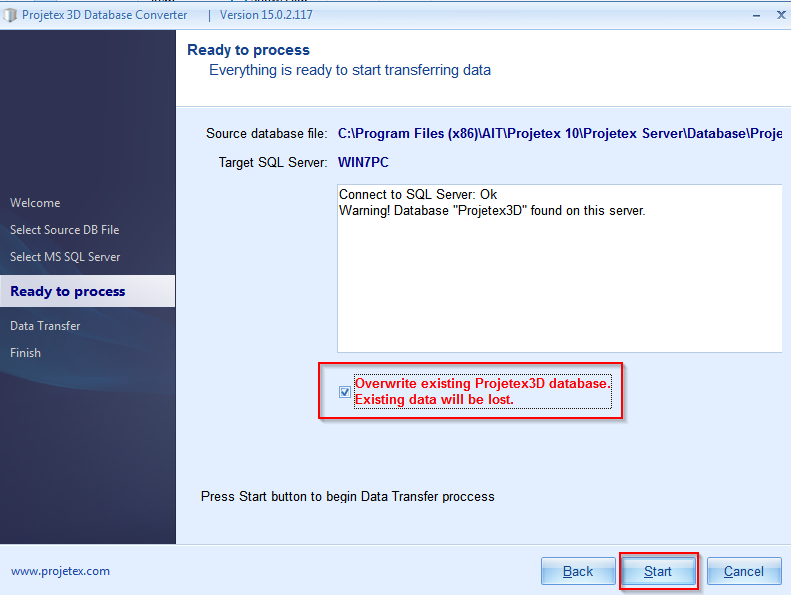
5. The Converter will connect to the server. If you installed Projetex 3D with the demo or empty database, the converter will ask you to confirm that you wish to overwrite the existing database. Make a backup copy of it if you do not wish to lose it. When you are ready to proceed, check the box "Overwrite existing Projetex 3D database." and click Start.
6. The Data transfer will proceed automatically. Then it is finished, click Finish to close the converter.
Running Projetex 10 Database Converter
If you are using versions of Projetex older than 10, or if you want to convert your Translation Office 3000 databases, the Projetex 10 Database Converter is supplied in the standard Projetex 3D setup as well. It allows to convert a database from Translation Office 3000 (Versions 7, 8, 9, 10 and 11) and Projetex (Versions 2006, 7.0, 8 and 9) into a Projetex 10 database. You will then be able to use the Projetex 3D Database Converter to convert the new Projetex 10 database for use in Projetex 3D.
1. Run the converter from either startup menu or by double-clicking ProjetexDBConverter.exe file (the default location is \Program Files\AIT\Projetex 3D\Projetex Server\DBConverter10\).
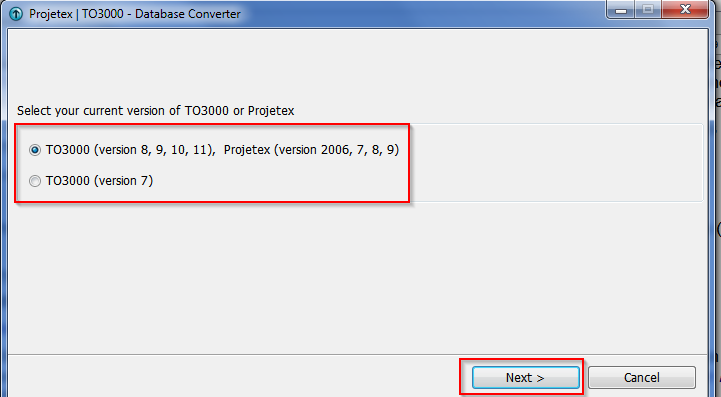
2. Select which kind of database you would like to convert and click Next.
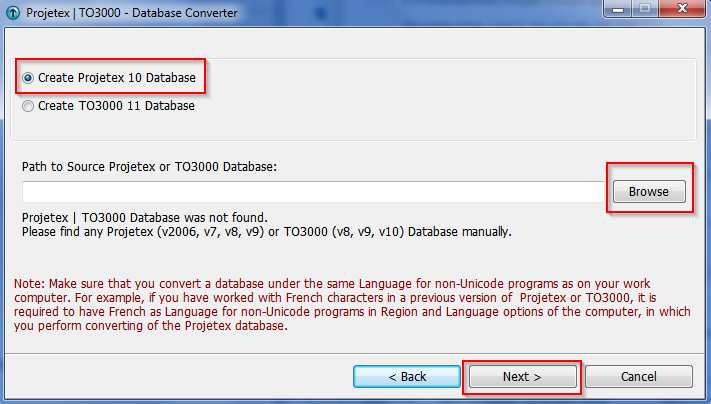
3. Select "Created Projetex 10 database", click the Browse button, manually specify a path to the source database file (which has been previously copied) and click the Next button.
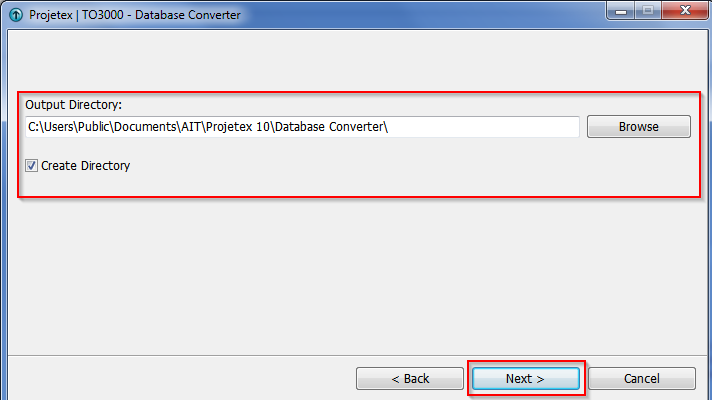
3. Specify a directory into which the database file should be outputted and click the Next button.
4. Click the Start button to convert the database for Projetex 10.
5. Start up the Projetex 3D Database Converter to convert the newly created database for use with Projetex 3D.
![]() Important
Note: Make sure that you convert a database under the same Language for non-Unicode programs as on your work
computer. For example, if you have worked with French characters in a
previous version of Projetex or TO3000, it is required to have French
as your Language for non-Unicode programs in
the Region and Language options of the computer,
in which you perform the Projetex database conversion.
Important
Note: Make sure that you convert a database under the same Language for non-Unicode programs as on your work
computer. For example, if you have worked with French characters in a
previous version of Projetex or TO3000, it is required to have French
as your Language for non-Unicode programs in
the Region and Language options of the computer,
in which you perform the Projetex database conversion.
View the System Locale settings for Windows
Click Start, then Control Panel, and Clock, Language and Region
Windows 10, Windows 8: Click Region
Windows 7: Click Region and Language
Windows XP: Click Regional and Language Options
In the Region and Language options dialog, click the Administrative tab. On Windows XP, click the Advanced tab. If there is no Advanced tab, then you are not logged in with administrative privileges.
Under the Language for non-Unicode programs section, click Change system locale and select the desired language.
Click OK and restart the computer to apply the change.

See also: